Customize Trados Studio to meet your individual needs

Nicole Loney 02 Mar 2021 8 min read

Everyone has their own way of working that makes them more productive, and this often extends to personalizing the software that is central to their job. Some people, for example, love keyboard shortcuts and want to be able to create their own. Some prefer to customize the ribbon or quick access toolbar (features common to Microsoft Office products and our Trados Studio CAT tool).

Like every piece of modern software, Studio has a long list of preferences – mostly accessible through File > Options – to make it work the way you want. Whether it’s keyboard shortcuts, customizing the ribbon (or making it disappear), changing the editor’s working font size, tailoring your autocorrect list, or a thousand other details, you can change the interface in both permanent and temporary ways to be more efficient. And if you realize, after playing around with settings, that you don’t like the way it’s working, you can always hit the ‘Reset to Defaults’ button in any settings dialog to undo the changes you’ve made. 

If you can customize something in other common Windows software, it’s likely you can do so in Studio too. If you’re not sure whether a customization is possible in Studio, try searching for it in the ‘Tell me what you want to do’ box. Failing that, the RWS Community forums may have an answer, or you can post your own question there. 

In this blog, I’m going to focus on a few ways to personalize Studio that relate more specifically to the translation workflow.

Work-pane windows: put them wherever you want

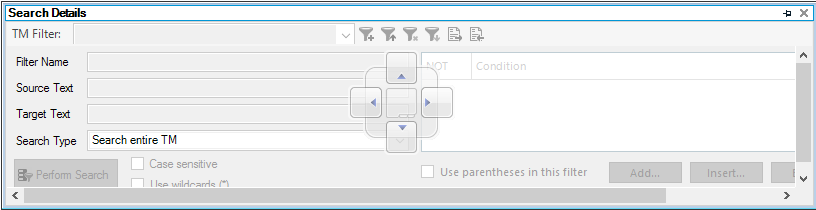
Studio offers seven different views (welcome, projects, files, editor, translation memories, reports and alignment), each of which has a navigation pane and work pane beneath the ribbon. Four of these views – projects, files, editor and translation memories – have their work pane further divided into a main view area and a number of windows. 

The views differ in how many windows they have and where you find them (most windows are in tabs above or below the main view area, but there are others as well). 

The important common feature of all of these windows is that they can be resized and moved. You can drag any window by its title bar and then do one of three things: 

  • Dock it in a different position (direction indicators show you where this is possible), which Studio will then remember as your choice.

 
  • Float the window over the view without docking it (which again, Studio will remember). 
  • Drag it right out of the view onto your computer desktop (if Studio isn’t using all the space) – or to another screen if you’re using multiple screens. So you could, for example, have a preview of the final document permanently open and in view as you work in the editor window. Or work with the advanced display filter permanently open on your second screen. 
Note that you can reset the window layout at any time, for example if you accidently close a window or change the layout and don’t like it. Just go to the ribbon, click on the view tab, and select ‘Reset Window Layout’ to move all the windows in the view back to their default positions.
 
Projects and templates
 
If you start a job in Studio by dragging or opening a file in the Welcome view, you have the option to ‘Create new project’ or ‘Translate as single document’. Many use the ‘single document’ option by default, without realizing how useful it can be to create a project. 
 
When you create a project, a step-by-step process takes you through a range of options to customize Studio’s setup for the needs of the project. This includes specifying the source and target language, any translation resources you wish to use (such as translation memories, termbases or machine translation providers), what to translate (and not) for specific file types, how you want your file to be prepared for translation (including whether you want to analyze the file or pre-translate it), verification settings to be used when you run a verification check for vital quality control, and many other project settings. 
 
The real power of doing this is that you can save all of these settings as a project template. Then the next time you have the same type of project (or similar), choose ‘Create new project’ again and simply apply the template. If the needs of the project are similar but not identical, apply and then change the template as necessary – and save that as a new template if you want. You can save as many different templates as you need, to suit the requirements of different jobs, file formats and customers. It’s one of the best ways to personalize Studio for different needs and save time. Learn more about projects and project templates here.
 
User profiles
 
Another way to save different settings is by creating different user profiles, which you can do in File > Setup > Manage User Profiles. Each profile contains all of the settings saved while using that profile, except for settings set for specific projects. You can use only one user profile at a time, but can switch between them at any time. You can also export any user profile, which is helpful if you need to work on a different computer or move to a new release of Studio, or if you want to share your settings with another user.
 
Apps
 
Don’t forget that we also offer more than 300 apps (and growing) to help you customize the way you work with Studio. These are mostly free, and all available in our AppStore. They’ve been developed by both our own and third-party developers. If you’re are a Studio 2021 or later user, you can use the integrated RWS AppStore
 
Between all of the ways you can personalize Studio, and the many ways to extend its functionality through the AppStore, it has never been easier to personalize your Studio environment to achieve your business goals!
Nicole Loney
Author

Nicole Loney

Product Marketing Manager
Nicole is a Product Marketing Manager at RWS. Nicole focuses on the translation technology needs of freelance translators and LSPs. She is responsible for generating product-focused content and conducting market research for the Trados portfolio. Owing to her degree in marketing and French, Nicole has developed a passion for consumer behavior, understanding what customers need and directing them to solutions that will help.
All from Nicole Loney